
What guides and drawings are available for installation?
We offer several guides and drawings for installing your letters and logos.
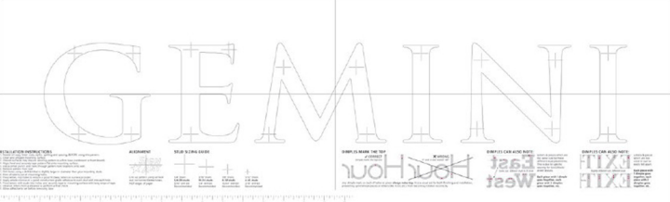
Perfect Pattern Computer-generated tracing of letters and exact mounting hole locations. Printed on weather-resistant material that is 54 inches high by necessary length and may come in pieces depending on the size of the installation.
Features and Benefits
- Precise drill locations are marked along with recommended drill bit size
- Identical letters are interchangeable
- Printed on weather-resistant Cannon Xtreme Bond paper for no smudging, no tearing
- Printed legend with instructions
- Ability to produce and install replacement letters, with no extra drilling
- Ability to pre-order a pattern allowing pre-work for large-scope installations
Note: For flat cut metal (1/4 inch thick and up), flat cut acrylic, and Gemleaf (3/8 inch and up) only. Learn more about Perfect Pattern here.

Drill Pattern This is a computer-generated tracing of letters with hand-punched hole locations of studs, printed on #60 white grid paper. Once taped to the wall, hole locations are drilled and then filled with adhesive. Created on weather-resistant material that is 54 inches high by necessary length and may come in pieces depending on the size of the installation.
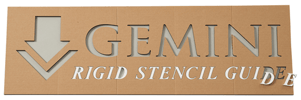
Rigid Stencil Guides Stencil is a computer-generated full-size cutout designed for smaller letters, logos, or bars. Typically used to install double face tape mounted letters. The guide is taped to the wall and letters are set inside the cutout and placed on the wall. Cardboard material is 22.3 inches high by 93.3 inches wide and may come in pieces depending on the size of the installation.
Material: Cardboard

Rigid Spilt Stencil This stencil guide is a partial cutout of the bottom portion of the letters about the baseline, plus 2 inches below the baseline which provides a perfect way to install plain, pad, or double face tape mounted flat cut letters. Rigid Spilt Stencil is generated using the same file that we use to produce your letters. The Gemini Layout Team will determine if Stencil or Spilt Stencil is best for your order. Material: Cardboard
 Spacing Guide A visual reference guide is typically used for pad mounted letters. The letters in specific copy are spelled out and properly spaced on a long pattern table or computer-generated. A narrow – approximately 2 inch – piece of paper contains small hash marks or plotted lower portions of the letters. The guide is secured to the wall with tape, but the installer provides a visual guide for installing letters. Material: Paper
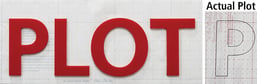 Plot Drawing Full size plot drawing, showing actual style and size desired by customer. This drawing is then sent Fed-Ex or UPS to the customer as they desire Material: Paper
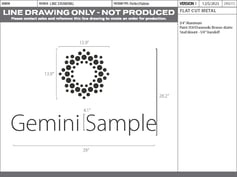 Line Drawing An 8 1/2 inch by 11 inch drawing showing the letter style and copy desired. A description of the style, size, and material will be provided on the drawing. The drawing also gives an approximate line length.
What mounting methods correspond to each pattern?
We have several mounting methods available for metal, plastic, and illuminated letters and logos, as well as, plaques, and changeable copy. The table below provides an overview of many popular mounting styles from Gemini.
Note: For challenging applications and technical questions, contact Gemini support through Partner Portal.
Drawing and Guide Key
| Mounting Pattern |  |
|||
| Stencil Guide |  |
|||
| Spacing Guide |  |
|||
| No drawing or guide is available | ✔️ |
Tip: Looking for information about a specific pattern? Check out Mounting Guides and Drawings
Note: * Indicates a minimum of a 3/8 inch thick letter.
| Metal | Plastic | |||||
| Cast | Flat Cut | Fabricated | Formed | Flat Cut Acrylic and PVC | Laminated | |
| Stud |  |
|
|
|
|
|
| Stud Brick/Block | |
|
|
|
|
|
| Top Stud | |
* |
|
n/a | * |
* |
| Bottom Stud | |
* |
|
n/a | * |
* |
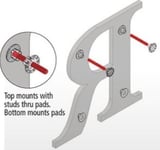
| Top & Bottom Stud | |
* |
|
n/a | * |
* |
| Rail/ Top | ✔️ | ✔️ | ✔️ | n/a | n/a | n/a |
| Rail/ Bottom | ✔️ | ✔️ | ✔️ | n/a | n/a | n/a |
| Rail/ Single | ✔️ | ✔️ | ✔️ | n/a | n/a | ✔️ |
| Rail/ Double | ✔️ | ✔️ | ✔️ | n/a | n/a | ✔️ |
| Bottom Angle Bracket | ✔️ | ✔️ | ✔️ | n/a | n/a | n/a |
| Welded Stud | n/a | |
n/a | n/a | n/a | n/a |
| Engineered Stud | n/a | n/a | |
n/a | n/a | n/a |
| Detachable Stud | n/a | n/a | |
n/a | n/a | n/a |
| Plain |  |
|
|
|
|
|
| Pad | n/a | n/a | n/a | |
|
|
| Combination | n/a | n/a | n/a | |
|
|
| Combination All | n/a | n/a | n/a | |
|
|
| Flange | n/a | n/a | n/a | |
n/a | n/a |
| Double-Faced Tape Mount | n/a | n/a | n/a | n/a |  |
|
| Z-Clip | ✔️ | ✔️ | ✔️ | ✔️ | ✔️ | ✔️ |
Note: These images are for reference only. Some restrictions apply. Review individual product articles for more information.
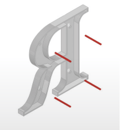 |
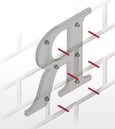 |
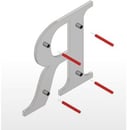 |
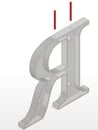 |
| Stud | Stud Brick/Block | Welded Stud | Top Stud |
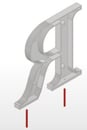 |
 |
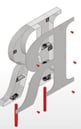 |
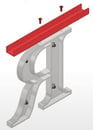 |
| Bottom Stud | Top & Bottom Stud | Engineered Stud | Rail/ Top |
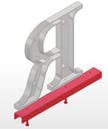 |
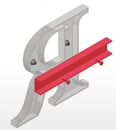 |
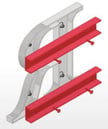 |
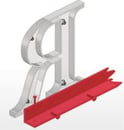 |
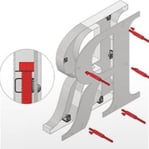
| Rail/ Bottom | Rail/ Single | Rail/ Double | Bottom Angle Bracket |
 |
 |
 |
 |
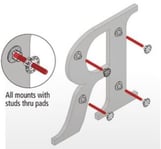
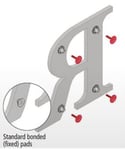
| Combination | Combination All | Pad | Detachable |
 |
 |
 |
|
| Formed Flange | Double-Faced Tape | Plain |
Install Tips
- Uneven surfaces: tape mounting pattern to a piece of cardboard or foamcore before taping to installation surface or assemble letters to rails.
- Adhesive: As a general rule, a good quality architectural grade silicone can be used to install lighter, stud mounted letters.
- Some exterior mounting surfaces, heavier letters, or install areas may require a "stronger" construction grade adhesive to better secure your letters.
- Ex: Areas needing to be more vandal resistant or installing on a rough, uneven surface.
- Some exterior mounting surfaces, heavier letters, or install areas may require a "stronger" construction grade adhesive to better secure your letters.
- Drill holes: If installing on brick or block, order letters with mountings in-line to hit the mortar joints.
- Drill these touch surfaces using a hammer drill.
- Drill holes slightly larger than stud diameter received.
- Ex: 4-40 studs are 3/32" diameter, while a 1/4-20 stud is 1/4" diameter.
More Resources

